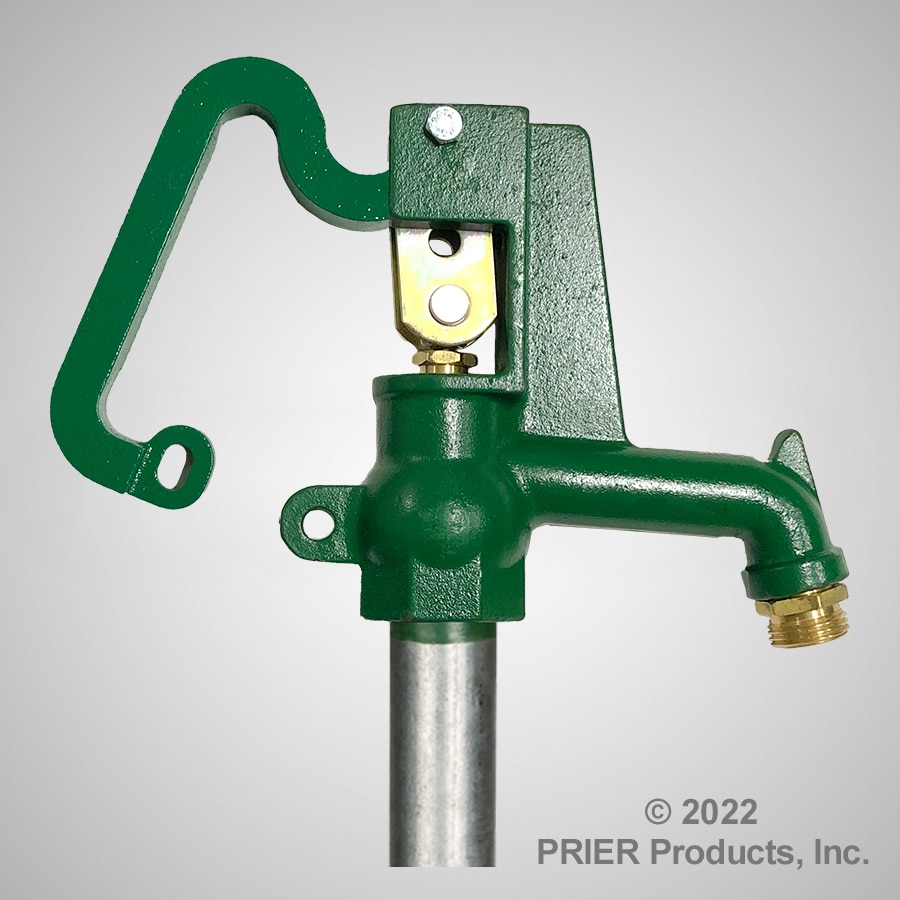
C-250 / C-251 | Heavy Duty Style

PRIER’s C-251 Freezeless Ground Hydrant provides a year round source of water to areas subject to freezing temperatures. The hydrant valve is connected to the supply piping below the frost line, and since it drains automatically, it is not subject to freezing.
The PRIER C-251 is a time tested design with a cam type operation lever control that provides full variable flow. It is available from stock in bury depths from 1’ to 6’, longer sizes are available upon request.
Features
- Solid, extra thick walled head casting
- 3/4” and 1” FPT inlet connection options
- Solid brass hose adapter
- Cam type operating lever control provides full variable flow
- High quality steel drawstraps that eliminate side pull of operating rod
- Pivot connector has double nut connection, no set screws to rust in place
- Galvanized outer pipe with exposed threads coated to protect from errosion
- Stainless steel operating rod provides the longest operating life
- Simple repair can be done at ground level
- Bucket hook on spout
Product Support
PRIER has manufactured the C-250 Freezeless Ground Hydrants for over 30 years. The product has evolved over the years and some old parts may be obsolete. The design is simple and easy to repair. Possible Repair Issues for the C-250 Freezeless Ground Hydrant include:
7. How do I assemble the parts on my stem?
Adjusting stem travel for a PRIER Bury Hydrant
1. The correct adjustment of this hydrant can be checked by raising the lever. Water should not run through the hydrant until the lever passes the half way point or horizontal position. When water is flowing through the hydrant it should shut off when lever comes down to the horizontal point. The last half travel of the lever in closing the hydrant opens the drain hole. Also in turning the hydrant on, the first half travel of the lever puts the cup seals in position to positively close the drain before the water is turned on.
2. Adjusting the plunger in the lower valve body.
a. To lower the plunger assembly into the valve body, take the handle bolt out of the head casting and remove the handle and draw straps (note: draw straps are bent inward which applies pressure on the handle when opening the hydrant). With two wrenches loosen the (2) 9/16" nuts on each side of the pivot connector. To lower the plunger turn the top nut upward (only one thread), then tighten the lower nut upward toward the pivot connector, then tighten top nut.
b. To determine if the water is not draining out the stand pipe, turn the hydrant on and let the water flow. Then push down the handle to close the hydrant with a cup of water covering the nozzle. If the water in the cup siphons back through the hydrant, the plunger is in the correct position. If the water does not siphon out of the cup then adjust the plunger in the same way as stated in (a). Then check to see if the water siphons out of the cup after adjustment.
